
This is what you need to get started:
- A book with the appropriate dimensions for your kindle or Ipad
- some fabric of your choice
- some elastic
- fabric glue
- Sissors
- Sewing machine
Here are the books that I picked up from the Thursday market.

The full tutorial starts after the break
I've made both books into kindle covers, but with slightly different techniques. But first the prep work:

1. Use a sharp blade to cut out the pages of your book, being careful not to cut through the outer spine. Keep the pages -who knows maybe you can use them later! You should now be left with an empty book cover like this:

If the spine of your book is a little fragile you can strengthen it with some masking tape.
2. Cut a piece of material into a rectangle the same size as you book cover + 1cm seam allowance.

Fold the sides of your rectangle a couple of mm more than you seam allowance and sew around the edges to make a nice finish.
Now you have two (at least) possibilities
- you can either make a pocket to slide your kindle into (as in the Oxford book) or you can fasten it with elastic (as in the David's band book).
First I'll show you the "Oxford" version:
1. Cut out a second rectangle the size of you kindle + 1,5cm to each side (you need it for seam allowance and to accommodate the width of the kindle).
2. Fold in and sew down one of the long sides of your second rectangle - this will be the opening seam of the pocket your kindle slips into.
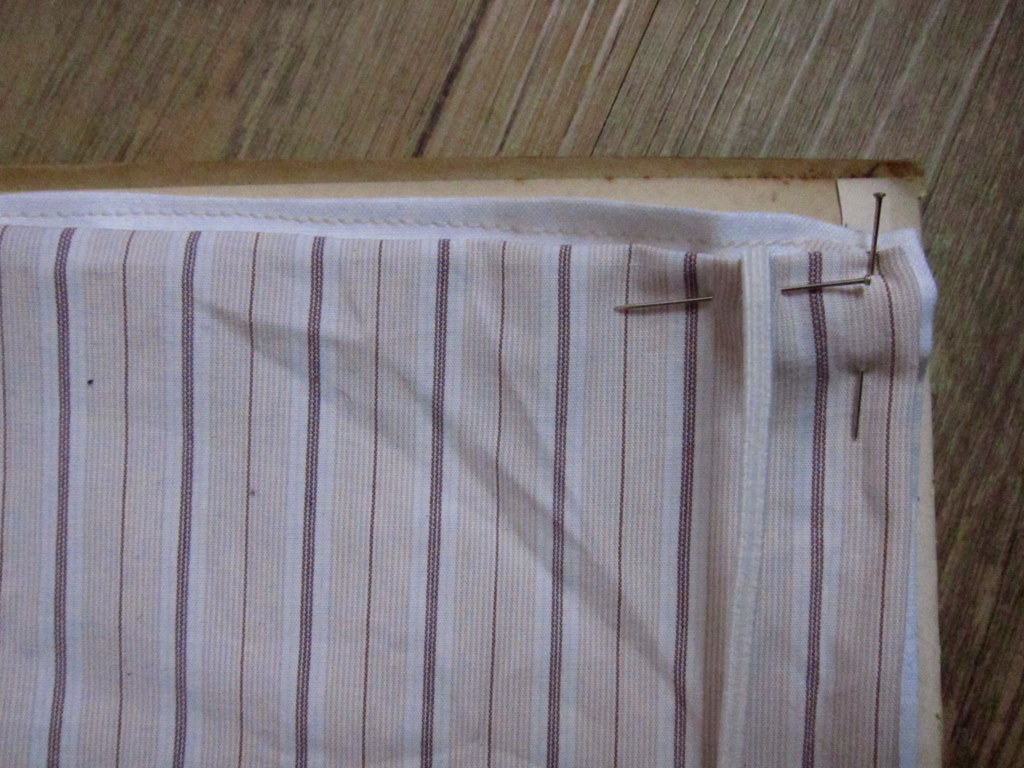
3. Now pin the pocket to your large rectangle as shown: (Don't sew it on just yet!)

4. You want the book cover to stay closed when out and about so cut a piece of elastic band that is 2cm longer than your book cover. Fasten the ends of the elastic in the seams of the top and bottom of the pocket about 2cm in from the outer edge of the book cover.
Sew around the three sides of the pocket, making sure that the elastic is fasten well.
The open side is the one facing the spine of the book.
You now have a rectangle with a simple pocket that has an elastic band going across it like this:

5. Now is the time to get out your glue! Brush you glue onto one half of the book cover (not too thick or it will seep through you material!)

Glue down one half of your fabric, brush glue onto the other half of the book cover and stick down the remaining fabric. Adjust as needed. Now you have this:

My corners were a bit loose and needed an extra dab of glue:

Now for the big test of your patience!
Only when the glue is DRY try putting your kindle in the pocket. Otherwise it will get very sticky!
BUT DO but your hand gently into the pocket to make sure that potential glue that might have seeped through doesn't glue your pocket shut!
You should now be set to go:


While this model works well, I wanted something I could just open and close so therefore:
The "David's Band" version: 
1. The first two prep stages are exactly the same as for the first version.

In the center of both of the short sides of your rectangle you want to sew on some ties (ribbon ect.). These will be used to tie the book shut.
2. Place the rectangle on your book cover, and the kindle on the rectangle. Take two lengths of elastic band, only slightly longer than your kindle, and pin in place. You don't want the elastic to be covering the screen or any buttons. Sew them fast on one side first, then hold them taut and fasten to the opposite side. It is important that the elastic is taut as it needs to hold the weight of the kindle without sagging.
Your rectangle will then be a bit curled up like this:

4. Now you should be set to go - unless you like me layered the glue to thick...
it made it all blotchy:

Solution:

And ready to go!

