Showing posts with label Edibles. Show all posts

Thursday, 20 January 2011

Baby food

Weaning is well under way here - 
Our little poppet is enjoying her food, especially egg, mushy peas, fish and oranges.
It's so handy to have food at the ready so I've been making various simple purees (i.e. peas and spinach, Carrots and pumpkin, apple and prunes) that I have frozen in ice-cube bags so you can mix and match flavors on the go. 


Aline loves joining in, holding a wooden spoon and taking in the action.


One big challenge however -how get the puree into the ice cube bags... 
Yes, If I have an enormous freezer I could use ice cube trays -which would be easier -
but I don't.

First I tried spooning it in - messy, not worth any further mention.

Then I tried a funnel, but the puree was too thick and it kept on leaking out of the top of the bag.

Then I had an idea -and I'm sure someone has had this idea before me and that there probably is a contraption out there that does exactly this, but I thought I'd share it anyway...


I used my big icing syringe! 


Instead of attaching a nozzle I attached the ice-cube bag and just squirted the puree into it.  
Use a rolling pin to gently push the puree to the bottom of the bag and be careful not to use too much force or the bag might burst! 
Then just stack up and pop in the freezer and defrost a cube or five as needed!

And yes this is an "unedited" post with appalling photos- our really life mess! Embrace it.

May you live until you die,
Linda


86785D3HTK6F

Monday, 13 December 2010

How to make gold

No Christmas without some bling

This time in the shape of crunchy sweetness - also known as Honeycombe, cinder toffee...

Ingredients:
  • 335g sugar
  • 125ml honey
  • 125ml golden sirup
  • 25g butter
  • 80ml water
  • 2 teaspoons bicarb
Please note that this is extremely hot and you do not want little fingers anywhere near the stove when making these! 
  1. Grease some baking paper and place on a baking tray
  2. Mix all the ingredients together except the bicarb in a big pan and bring to a boil. It needs to boil while stirring for about 10 min. To see if it is ready drop a few drops of the mixture into a glass of cold water. If it just dissolves it needs to boil longer, if it turns into a hard/firm ball then it is ready for the next step.
  3. Now for quick action. Quickly stir in the bicarb and pour immediately onto your pre-greased sheet. This is going to make it expand very rapidly! It turns it into an erupting volcano.
  4. When it has cooled down, break into pieces. For some extra luxury dip into melted chocolate. Store in an air-tight box.

Friday, 10 December 2010

Truffles

C is for Christmas and chocolate.

And Truffles are one of the best ways to enjoy chocolate 
therefor Truffles should always be made for Christmas 
to be given as presents and to be eaten.


So a few days ago I made truffles with my friend Sharon. 

We made vanilla scented ones.
We made peppermint infused ones.
We made chocolate orange ones.

Here is the recipe we used:
(It makes about 60 truffles)

  • 1 tub of Cream cheese
  • 350g icing sugar
  • 500g chocolate of your choice -the higher the cacao content the better in my book!
  1. Melt chocolate in a bowl over a saucepan of gently simmering water. 
  2. Meanwhile beat cream cheese and icing sugar until light and fluffy.
  3. Mix in the melted chocolate.
  4. Divide into different bowls if you are doing different flavorings. 
  • For chocolate mint -add 3-4 drops of peppermint essential oil (edible quality). We rolled ours in icing sugar.
  • For chocolate vanilla  - 1 teaspoon of vanilla extract. We rolled ours in ground almond.
  • For chocolate orange - add the zest of one orange. We rolled ours in coco.
  • Other ideas are a teaspoon of strong espresso - chili - salt - Earl Grey tea
5. leave to cool down in the fridge for an hour before shaping into little bite size balls. They are rich so don't make them too big!

6. Store in an airtight container for up to two weeks in the fridge. For the best flavor take desired amount out of the fridge an hour or two before devouring.

Enjoy!

Monday, 29 November 2010

Tea and sympathy

- in the form of shortbread.

After several weeks of coughs, clods, fevers and general busyness (hence the long absence) you just need to sit down with a nice cuppa and something comforting.
Sunday comfort took the shape of shortbread it is super easy to make and is well worth the hour it takes to bake in the oven.


Here is the recipie I use (it is a modified Delia one)

  • 180g butter
  • 2 tbs of muscavado sugar (for a caramel flavor)
  • 75g sugar
  • 1 tbs Vanilla extract
  • 180g plain flour
  • 80g semolina (for crunch)
1. Pop your oven on to 150C


2. Mix sugar and butter until light and fluffy.


3. Mix in the flour and semolina until you get a smooth dough and clean bowl. (But don't knead it!)


4. roll out on a lightly floured surface until about as thick as your finger and pop into a baking tray.


5. prick all over with a fork.


6.place in the middle of the oven for 60-70 min -or until golden and firm in the center. When you take it out of the oven score it with a knife or pizza cutter so you can easliy break it into dipping fingers when cooled. Cool on a rack. 


7. Enjoy with a nice cup of tea, some knitting and a good movie.

Tuesday, 16 November 2010

Birthday party ideas II

After a big meal you still might want a little sweet -so why not overindulge (guilt free) on home made blackberry ice-cream? 
For 6 people take 
  • 5dl frozen blackberries (or other frozen fruit)
  • 4 tbs of fat free yogurt
  • 3 tbs of honey
  • 1 tsp of vanilla paste (or just use vanilla yogurt) 
Blend/crush with your hand held blender -my Bamix does it in around 6min.
As this is a healthy, fat free dessert feel free to mix in some chocolate chips and crushed meringue.   


I just managed to take a picture of it before it was devoured - I had to work quickly due to mouth watering hence the bad lighting. So you'll just have to imagine the intense deep purple of this super easy indulgent dessert.     

Birthday party ideas I

Last Friday I had the honor of hosting a birthday party for my dear friend Mary. 
We had such a lovely girly evening -good food, nice wine, lots of chocolate, stimulating conversation, cupcakes, great coffee and did I say chocolate?

What's a party without a birthday bunting? 
How do you make a bunting in less than 15min and not enough time to get out all your crafty stuff? You use paper-dollies!


Cut 5 paper-dollies into quarters and spell out Happy <3 Birthday! -one letter on each triangle with a marker. Tip: Don't write with them in a pile as the marker might stain through
Then you just thread a ribbon through the holes in the dollies. Hey presto!

    
Happy Birthday!


Friday, 5 November 2010

Comfort in a cup

Sometimes my morning doesn't go to plan. 
Occasionally (actually rather often) my ambitions for the day goes down the drain. 
From time to time my aims for the week are just not doable.
Suddenly it is November and I haven't even registered that October was here!
Its been several weeks of lovely visits from family, Aline's christening and perpetual colds and runny noses for everyone in the household -and failing internet.  So my intentions of exercise, blogging and PhD-ing... -well let's just say it didn't happen. 


When October was at it's snottiest and I was feeling rather miserable for having to be shut up inside and not having the energy to do exercise or studies a blog entry from Homemade Mamas brightened my day. They blogged about making cake in a mug in minutes -too good to be true. So I gave it a try -and for the amount of effort (or should I say lack of effort) that is required and the (lack of) time it take to make I can warmly recommend it for those days where nothing goes to plan and you need to take a moment out and remember that life isn't to bad after all.


The second time I made it (yes, I had more than one occasion last month were I needed a time out) I did some changes which in my opinion made it even better *wink*. If you want the original version (with simpler ingredients) you'll find the recipie by clicking on the link above. 
My pimped version is under the photos. The recipe is supposed to be for one big mug, but on both occasions I've found it enough for two mugs (which makes Stefan happy) -even though that means it doesn't bulge decadently over the top.  


    Ingredients:
  • 3 Tbsp. Self-Rising Flour
  • 1 Tbsp. of ground Almond
  • 3 Tbsp. Sugar
  • 1 Tbsp. Muscovado sugar
  • 1 Tbsp. Oil
  • 2 Tbsp. Milk
  • 1 Tbsp. natural yogurt or sour cream
  • 2 Tbsp. Unsweetened Cocoa
  • 1 Egg
  • 1 Splash of Vanilla
  • 1 Large Coffee Mug
Optional extras:
  • 3 Tbsp. chocolate chips
  • a splash of Coffee
  • some orange zest
  • caramel sauce 

 Mix it all together and pop in the microwave for about 2 1/2 minutes.
Serve while warm with some ice-cream or just a dusting of vanilla sugar. 

Now colds are clearing up, we are back online, I've been for a run and November with all it's coziness is upon us! 

Tuesday, 7 September 2010

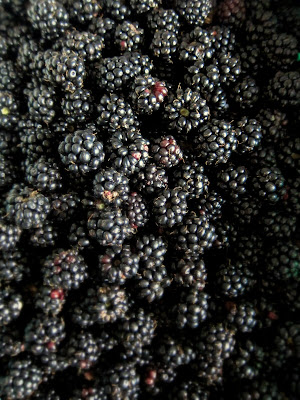
Blackberries Blackberries Blackberries

Friday I was out picking Blackberries to make blackberry cupcakes for Michelle and Zack's leaving party. (So sad that they are leaving today)


I used a straight forward vanilla cupcake recipe and put three of four blackberries in each cupcake before baking them. 


I decorated them with blackberry buttercream that I just mixed together without a recipe so it turn out a bit runny, but fortunately it was very tasty. 


Next time I'll have to use a little less blackberries in the icing I think - or maybe it will help if I cool the icing down to thicken the butter before spreading it on.I'll be trying it again so I'll let you know how my experimenting in the kitchen goes.  

Saturday, 21 August 2010

A Family tradition


Every year the cherry tree at my parents house is loaded with cherries. They are rather sour and therefore an acquired taste if eaten straight from the tree. For several years now my mother has made a delicious cherry liquor with them - which in turn has become the cornerstone of our family's traditional Christmas pudding. As we are going to have Christmas at home for the first time this year, it is our turn to keep the traditions going. And of course give me a taste of the big family Christmas which I'll miss terribly.


So on the last day of our holiday in Oslo my nephew and I picked cherries that I could take home to Oxford with me so that I could have a go at making my own cherry liquor. 


Back home in my kitchen I layered cherries and sugar in a big (sterilized) jar and topped up with Gin as I had been instructed by mum. And I've been turning the jar a few times a day for the past week until the sugar has dissolved. So far very easy. And now for the hard bit - letting it marinade in the cupboard until Christmas...    


So if your in Oxford for Christmas pop by for a try!

Monday, 31 May 2010

Stefan's scrumptious bread - RECIPIE!


As promised here is Stefan's recipe for a wholegrain bread.It doesn't take that much hands-on time, the secret is lies in letting it rest and prove long enough. So you need to be making it on a day/afternoon you plan to be pottering around at home. The second secret is kneading the dough when mixing - this is easy peasy if you have a good kitchen mixer, if you don't have one it takes a little longer but your reward is a good therapeutic work-out toning you arms and upper body. We also use local flour from The Oxford Bread Group, and we can highly recommend it! We get flour delivered to our local hub every other week, but the main thing they do is delivery of bread.


This recipe makes three big loafs.

Ingredients:

Step 1
3 1/2 dl boiling water
180 g wholegrain rye
70 g wholegrain wheat 
70 g sunflower seeds
50 g sesame seeds
50 g flax seeds

Step 2
1 liter water - it needs to be fairly warm about 30C
1100 g strong white flour
150 g strong brown flour
150 g rye flour (sometimes we use oat flour instead)
40 g sea salt
25 g fresh yeast (if you can't get fresh yeast use dry yeast) 

  • Step 1: Place all the ingredients in step one in a bowl and pour over the boiling water. This helps the seeds blend in better with the dough and keeps it nice and moist. Cover the bowl and let is cool down. Stefan often does this the evening before or in the morning before he goes to the library.

  •  Step 2: Mix all the ingredients - including the seed mix in a big bowl, but keep about 1 dl of water back for later in the kneading process. Start kneading the dough at slow speed for about 4 min(7 min if hand-mixing) and then increase the speed and knead for another 5 min (8 min if hand-mixing). When you have increased the speed slowly add the rest of the water. The dough is ready kneaded when it is subtle and has a shine to it. When you stretch it, it should give you nice long strings of dough. This means that the gluten is doing its job and that you bread will rise nicely. By the way the dough is probably wetter and looser than what you are normally used to, this is how it is supposed to be so don't panic.
  •  Cover your dough with a clean tea towel and place in a warmish place, or at least out of the draft. (During winter we fill our sink with hot water and place the bowl on a baking tray on top of the sink)Let you lovely dough rest for about 1 1/2 hour while you get on with your life. 
  •  
     
     
    • Lightly dust your counter top with flour, 'pour' out your dough and divide it into 3 chunks and let them rest for 20-30 min on the counter top. Just enough time to wash up the bowl and have a cup of tea! Shape the 3 lumps of dough into loafs and place them in bread tins (that you have gently brushed with oil). Brush your loafs with lukewarm water and sprinkle on some seeds if you like.  


    • Let the loafs prove until they have doubled in size (again covering them loosely with a tea towel and leaving them in a comfy place). This might take 1 - 2 hours. Put you oven on 220C while the loafs are proving. When they have risen, bake them on the lowest section of the oven for about 30-45 min. They are done when they are lovely and golden and sound hollow when you give them a tap. Take them out of their tins and cool them on a rack. 


    • Enjoy while still slightly warm with butter and lovely jam! 


    Saturday, 22 May 2010

    Waffles


    As we didn't get to go home for the Norwegian national day on the 17th of May, we celebrated it in our garden making waffles and watching the parade on youtube (Here and here and here and here are some examples for those of you have no idea of what I'm on about). Not quite the same as the real thing, but still a taste of home!


    For those of you who have a Norwegian style waffle press (not a french waffle press!)at home here is the recipe we tend to use:

    Ingredients:
    2 eggs
    2 dl sugar

    5 dl white flour
    1 ts vanilla sugar
    1 ts cardamon powder
    2 ts baking soda
    5 dl milk
    150g melted butter
    a small pinch of salt
    2 tbs of water

    1. Start off by whipping together eggs and sugar so it's light and fluffy.
    2. Mix the dry and wet in separate bowls before adding them gradually into the egg mix. Continue until all is combined.
    3. Let the batter rest for 15 min. It should be like thick pancake batter.


    Enjoy!

    Super easy Banana cake


    This morning when I came down to the kitchen I was greeted by the smell of bananas. After a little hunt I found the bunch of very ripe bananas in the bread box (!?!). Something had to be done with them very soon, if not they'd go in the bin. 
    After a couple of Google searches and reading several recipes, this is the one I synthesized according to the number of bananas I had at hand and the content of my storage cupboard. Amazingly enough, despite my experimental approach it turned out lovely! And it was super easy - it took me 15min to mix together - the most time consuming part being copping the chocolate and walnuts.

    I made mine in a large tray-bake tin, but it could be done in two loaf tins, a cake tin or half the recipe for one loaf tin. It's not that sweet so if you have a sweet tooth maybe do 400g of sugar. Next time I'll probably use half brown sugar for a more caramelly taste.   
    Ingredients: 
    225g butter
    340g sugar
    460g self-raising flour
    4 eggs
    5 large or 6 medium very ripe bananas

    optional extras - try all or just one whatever you have in the house:
    a couple of handfuls of chopped chocholate
    a couple of handfuls of chopped nuts
    2 tablespoon of honey
    2 teaspoons of cinnamon
    1 tablespoon of vanilla essence

    1. Turn your oven on 180c and grease an appropriate tin.

    2. Cream butter and sugar together, followed by adding the eggs.

    3. Mush your bananas with a fork and add to the creamed butter,sugar and eggs mix.

    4. Add the flour and whatever extra flavorings you have at hand and mix well.

    5. Pour into your tin and cook in the oven for about 40min or until the tip of your knife comes out clean.


    6. Make some nice icing, serve with a spoon of thick vanilla yogurt or eat plain with a cup of tea!


    Enjoy!


    Saturday, 20 February 2010

    Homemade Crunchy Muesli

    Yesterday we ran out of cereal, and being lazy as I am I couldn't be bothered to go to the shop so instead I made some (actually quite a lot...) crunchy muesli. This morning when I woke up I had a lovely bowl of it with rhubarb at our kitchen table. It was so good that I will share the recipe with you!It's very easy to do and it's basically use what you've got in the house approach. I'm not that fond of dried fruit in my muesli so I didn't put any in (I normally put fresh fruit on top instead), but of course feel free to throw in some raisins, dried figs or peaches whatever you fancy or have at hand.

    Ingredients:

    1 cup or nearly 2,5 dl rapeseed/flaxseed oil (or other healthy oil e.g. coconut oil or olive oil - not extra virgin unless you want your muesli to taste like olives...) 
    5 generous tbsp of honey
    1 tbsp of vanilla extract
     
    500g of rolled oats
    300g of mixed nuts (I used almonds, hazelnuts and walnuts as that's what I had lying about...)
    75g pumpkin seeds
    75g sunflower seeds
    50g linseeds
    50g sesame seeds
    75g oatbran
    50g wheat germ 
    1.Put the oven on 170C.

    2.Gently heat the honey and oil with the vanilla in a pan over low heat until the honey is nice and runny and you can stir the mix easily.

    3. Mix all your dry ingredients in a BIG bowl and pour over the honey and oil mixture. Stir well until all the dry ingredients are evenly coated.

    4. Split the mixture between two large baking trays and spread into an even layer. Bake in the oven for about 20 - 25 minutes until golden brown, remembering to stir and toss it every 5 minutes! I know this sounds like hard work, but if you don't you'll end up with some of it burnt and some of it soggy... Why not use the 20 min in the kitchen to do the dishes? (not that it was what I did...I watched movie trailers on my mac, they very conveniently last around 4 minutes each...). Take out of the oven and leave it in the trays! Continue to stir through the trays every now and then until they are COMPLETELY cool, if not you loose your hard earned crunch.

    5. Store in an air tight container and enjoy! (if you do want to add dried, fruit this it the time to do so) It lasts for up to two months...that is if you don't eat it before that.
      
    If you were wondering this recipe give you about 1kg of muesli.